
Read Time: 11 min
Crisp autumn mornings across Chester and Lancaster counties bring some of the best riding weather of the year. They also bring colder pavement, morning dew, and wet leaves. A motorcycle rides on two small contact patches, so there is very little margin for neglected maintenance.
A five-minute pre-ride motorcycle safety inspection in your garage makes sure your bike responds when you need to brake hard or swerve. Fall temperature swings also lower tire pressure and stiffen rubber, which makes seasonal checks even more important.
This guide walks through a 10-point checklist you can run before every ride, with specific tolerances, what to look for, and the warning signs that mean it’s time for professional service or your Pennsylvania state inspection.
TL;DR / Quick Summary
A five-minute pre-ride check catches tire, brake, and drivetrain problems before they become roadside failures on cold fall roads.
Key Takeaways:
- Check cold tire pressure before every ride; it drops about 1 PSI per 10°F.
- Test front lever and rear pedal firmness to catch air or leaks in the brake lines.
- Set chain slack to your manual’s spec, typically about 1 to 1.5 inches.
- Keep fork tubes dry; leaking seals can contaminate front brake pads.
- See a pro for frame damage, notchy steering, or a pulsing brake lever.
Why Autumn Weather Demands a Rigorous Pre-Ride Check
Fall riding in southeastern Pennsylvania tests your bike in ways summer doesn’t. Cold overnight temperatures lower tire pressure and stiffen rubber compounds, so tires take longer to build grip on a morning ride.
Wet leaves on rural routes like PA 372 and PA 10 can be as slick as ice and sharply reduce available traction. When grip is limited, your tires, brakes, and suspension need to work exactly as designed. Seasonal transitions are when small oversights, like glazed brake pads or a loose axle pinch bolt, turn into roadside problems.
The 10-Point Pre-Ride Motorcycle Safety Checklist
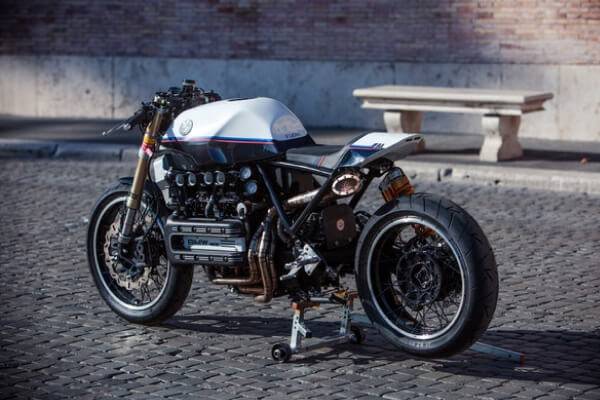
Before you ride, walk a full circle around your bike with a small flashlight and work through these 10 points. They follow the categories of the Motorcycle Safety Foundation’s T-CLOCS inspection checklist (Tires and wheels, Controls, Lights and electrics, Oil and other fluids, Chassis, and Stands), expanded with the specific tolerances riders ask about most.
1. Tire Pressure, Tread Depth, and Sidewalls
Tires are the most safety-critical part of your motorcycle, and you can’t judge pressure by squeezing them. Use a quality digital or dial gauge and check pressure cold, before riding more than a mile. Match the PSI on your swingarm decal or in your owner’s manual.
Pennsylvania’s inspection standard sets a minimum tread depth of 2/32 inch. During wet fall months, consider replacing tires at 3/32 inch so they clear standing water and wet leaves more effectively. Look between the tread blocks for dry-rot cracking, embedded glass or gravel, and any exposed cord.
2. Brake Pads and Rotors
Your front brake provides roughly 70% or more of your stopping power, so pad condition matters. Shine your flashlight into the caliper and check the friction material. Replace pads at your manufacturer’s wear limit, typically 1 to 1.5mm, or when the material reaches the wear-indicator groove.
With the rotors cool, run a finger across the braking surface. Deep scoring or a raised lip at the outer edge means the rotor is wearing, so compare its thickness to the minimum stamped on the rotor itself. Warping won’t show up by touch; you’ll feel it as a pulsing brake lever.
3. Brake Fluid and Lines
Hold the bike upright and check the front master cylinder sight glass and the rear reservoir. Fluid should sit between the level marks. Fresh DOT 3 or DOT 4 fluid is light amber; dark brown fluid is old and has likely absorbed moisture, which lowers its boiling point and can cause brake fade under hard use. (Some older Harley-Davidson models use purple DOT 5 silicone fluid, which must never be mixed with DOT 3 or 4.)
Trace each brake line from master cylinder to caliper, looking for wet fittings, cracked rubber, or spots where a line rubs the frame. Then squeeze the lever and press the pedal before starting the engine. Both should feel firm, not spongy.
4. Engine Oil, Coolant, and Leaks
Check oil level using the exact procedure in your owner’s manual. Most bikes read correctly only when held upright on level ground, though some models specify a different method. On liquid-cooled bikes, confirm the coolant overflow bottle sits between MIN and MAX, and check the radiator for bent fins or debris.
Finally, look under the engine for fresh drips of oil, coolant, or (on bikes with a separate primary chaincase) primary fluid. A new spot on the garage floor is far easier to deal with than a leak on the side of the road.
5. Lights, Turn Signals, and Brake Light Switches
Shorter fall days and morning fog make lighting your best defense against drivers who don’t see you. With the ignition on, check low and high beams, all four turn signals, and the matching dash indicators.
Test the brake light twice: once with the front lever and once with the rear pedal. Each control has its own switch, and the rear switch often gets knocked out of adjustment by road grime and boot contact. If only one control lights the lamp, fix it before you ride.
6. Throttle and Clutch
Turn the handlebars to full lock left, center, and full lock right, twisting the throttle open and releasing it in each position. It should snap closed instantly every time. A throttle that sticks at full lock usually points to a cable routing or lubrication problem.
On cable clutches, check free play at the lever against your owner’s manual, since the spec varies widely by manufacturer. Look for frayed strands where the cable enters the lever, a sign it could snap. Hydraulic clutches have no cable to adjust, but check their reservoir the same way you check brake fluid.
7. Final Drive: Chain, Belt, or Shaft
For chain drives, measure slack at the midpoint of the lower run. Most street bikes call for about 1 to 1.5 inches, but check your manual for the exact spec and whether to measure on the side stand or with a rider aboard. A chain that’s too tight strains the output shaft and wheel bearings; one that’s too loose can jump a sprocket.
Inspect the rear sprocket: hooked or pointed teeth mean the chain and both sprockets need replacing as a set. On belt drives, look for stone damage, cracks, or frayed edges. On shaft drives, check the final drive housing for gear oil seeping around the hub seal.
8. Fork Seals and Rear Suspension
Hold the front brake and push the forks down hard three or four times. Then inspect the fork tubes, which should be clean and dry. A ring of oil means a leaking fork seal, and that oil can run down onto your front brake pads and reduce stopping power.
At the rear, look for oil on the shock body or shaft. Push down on the seat; the bike should settle once rather than keep bouncing. Worn damping makes the bike wallow in corners and over bumps.
9. Fasteners, Wheel Bearings, and Steering
Vibration loosens bolts over time. Check the front axle pinch bolts, rear axle nut, caliper mounting bolts, handlebar clamps, and footpeg brackets for anything loose or missing.
If you have a center stand or paddock stand, lift each wheel, grasp the tire at the top and bottom, and rock it side to side. A clunk or any play points to worn wheel bearings. With the front wheel off the ground, turn the bars slowly from lock to lock; a notchy feel at center usually means worn steering head bearings.
10. Side Stand and Safety Cutoff
Check that the side stand pivot bolt is snug and that the return spring holds the stand firmly against the frame. A stand that drops while cornering can catch the pavement and cause a crash.
If your bike has a side stand cutoff switch, test it. Sitting on the bike with both feet down and the stand up, start the engine in neutral, pull the clutch, shift into first, and lower the stand. The engine should shut off immediately. If it keeps running, the switch needs repair before you ride.
What You Can Handle vs. When to Call a Pro
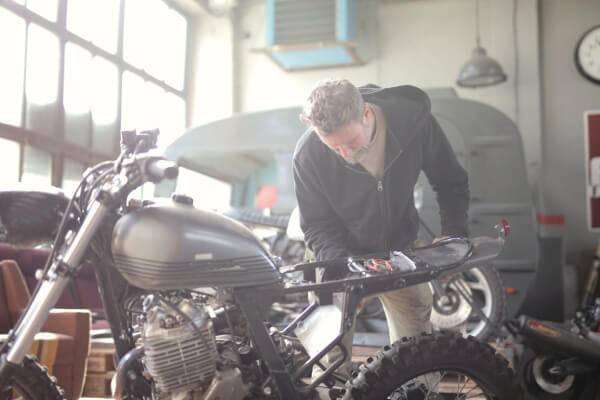
Knowing where routine owner maintenance ends and professional repair begins protects both your safety and your bike.
Tasks Most Riders Can Do
- Tire pressure: Check and top off cold tires with a reliable gauge and a home compressor or floor pump.
- Chain cleaning and lube: Use motorcycle-specific chain cleaner and a grunge brush, then lube every 300 to 500 miles or after riding in rain.
- Bulb replacement: Swap halogen signal, plate, and headlight bulbs per your manual. LED lights are often replaced as a full assembly.
Tasks for Confident DIYers
- Oil and filter changes: Requires a filter wrench, a new crush washer, and a torque wrench to avoid stripping aluminum drain threads.
- Brake pad replacement: Requires cleaning caliper pins and pushing pistons back; only do it when rotors and lines are in good shape.
- Chain slack adjustment: Requires an axle socket, a torque wrench, and careful alignment so the rear wheel isn’t cocked.
When to Call a Professional
- Brake bleeding and ABS service: Some ABS systems need a dealer-level scan tool to cycle the pump during a fluid flush.
- Fork seals and suspension: Rebuilds require seal drivers, spring compressors, and exact oil volumes.
- Steering head and wheel bearings: Press-fit bearings need pullers or a press, and steering bearings need correct preload.
- Pennsylvania state inspection: Must be performed annually by a certified inspector at an official inspection station.
Red flags requiring immediate professional attention:
- A pulsing front brake lever (warped rotor or uneven pad deposits)
- Brake fluid that keeps dropping with no visible leak
- Handlebar wobble or head shake
- Cracked frame paint, rust at welds, or a bent rim after a pothole, tip-over, or crash
Even a low-speed tip-over can bend levers, crack fairings, or scuff a tank. As a collision and custom paint shop, we repair that damage too. See our guides to custom motorcycle painting and motorcycle paintless dent repair.
Common Pre-Ride Inspection Mistakes to Avoid
Even experienced riders fall into habits that undermine a pre-ride check.
1. The Thumb Check
What people do wrong: Pressing a thumb on the tire to judge whether it “feels” inflated.
Why it’s a problem: Stiff motorcycle tire carcasses feel nearly the same at 20 PSI as at 36 PSI. Underinflation causes sidewall flex, heat buildup, slow steering, and unpredictable grip in corners.
The right approach: Use a gauge on cold tires before every ride.
2. Checking Oil on the Side Stand
What people do wrong: Reading the oil sight glass while the bike leans on its side stand.
Why it’s a problem: On most bikes, the lean gives a false low reading, and riders add oil until the engine is overfilled. Excess oil can foam, raise crankcase pressure, and push past seals.
The right approach: Follow your owner’s manual procedure, which for most bikes means upright on level ground. A helper or a paddock stand makes this easier.
3. Lubing the Chain Right Before Riding
What people do wrong: Spraying lube on a cold chain moments before heading out.
Why it’s a problem: Fresh lube hasn’t had time to set, so it flings off onto the wheel, the swingarm, and potentially the rear tire. On O-ring chains, the internal pins are sealed with grease at the factory; the lube’s job is to coat the rollers, side plates, and O-rings, and its carrier needs time to evaporate and leave a tacky film.
The right approach: Lube the chain after a ride while it’s still warm, then let the bike sit, ideally overnight.
Conclusion
A 10-point pre-ride motorcycle safety inspection takes about five minutes and catches the problems behind the worst surprises: an underinflated tire, a leaking fork seal, a frayed clutch cable. Check tire pressure and brake feel before every ride, and make the full walkaround a habit, especially as fall temperatures swing.
If your check turns up worn brake pads, leaking fluid, uneven tire wear, or handling problems, don’t ride on it. At Barry’s Collision Repair in Parkesburg, we handle motorcycle repairs, preventive maintenance, and official Pennsylvania motorcycle state inspections. Call us at (610) 593-2775 or schedule your inspection online.
Serving Parkesburg, Atglen, Coatesville, Gap, Oxford, Downingtown, and the surrounding Chester and Lancaster County area.
Frequently Asked Questions
How long does a pre-ride motorcycle safety inspection take?
A pre-ride inspection takes about three to five minutes once the routine is familiar. Checking tire pressure, lights, brake feel, and fluid levels quickly becomes second nature. Save the deeper checks, like wheel bearings and chain wear, for a weekly or monthly look.
How often does a motorcycle need a Pennsylvania state inspection?
Pennsylvania requires motorcycles to pass a safety inspection every year at an official inspection station. Inspectors check safety items including brakes, tires, lighting, steering, and exhaust. Riders who run regular pre-ride checks are far less likely to be surprised by a failed item.
Why does my motorcycle tire lose pressure in the fall?
Tire pressure drops roughly 1 PSI for every 10°F drop in temperature because the air inside the tire contracts as it cools. Fall’s swings between warm afternoons and cold nights make the change noticeable. Check pressure cold, before every ride, rather than after the tires have warmed up.
What causes a motorcycle brake lever to feel spongy?
A spongy lever is usually caused by air trapped in the brake lines. Air compresses under pressure while brake fluid does not, so the lever travels farther without building firm braking force. Old fluid that has absorbed moisture can also boil under hard braking and produce the same feel. Both call for a professional brake bleed.
How often should motorcycle brake fluid be changed?
Most manufacturers recommend replacing brake fluid every two years, regardless of mileage. Brake fluid absorbs moisture from the air over time, which lowers its boiling point and can corrode caliper pistons. Check your owner’s manual for your bike’s interval and fluid type.
How do I know if my motorcycle chain needs replacing?
Replace your chain if it has tight spots or kinked links that stay stiff after cleaning and lubing. Other signs include hooked or pointed sprocket teeth, or running out of adjustment range on the rear axle. A worn chain should be replaced together with both sprockets.
Related Resources
Sources
- Motorcycle Safety Foundation — T-CLOCS Inspection Checklist — Pre-ride inspection categories used to structure the checklist.
- Pennsylvania Department of Transportation — Vehicle Safety Inspection Program — Annual motorcycle inspection requirement and the tire tread-depth standard