Read Time: 8 min
A motorcycle is a deeply personal machine, but years of road grit, UV exposure, minor tip-overs, or dated factory graphics can leave your bike looking tired. Off-the-shelf paint rarely captures individual style, and factory finishes cannot match the visual depth of hand-crafted flake, candy coats, or custom airbrushing. When your bike’s finish no longer reflects the pride you take in riding it, a full overhaul is the only lasting solution.
Transforming raw metal, composite fairings, and stripped tanks into a flawless showpiece requires a disciplined balance of substrate chemistry, mechanical prep, and artistic execution. At Barry’s Collision Repair, we have applied precision automotive finishes since 1973, pairing generational spray-booth craftsmanship with modern digital paint-matching systems.
This guide breaks down the full concept-to-finish workflow for custom motorcycle painting, explains why early fall is the most strategic window to book shop time, and highlights the technical standards that separate showroom paint from a finish that fails within two seasons.
TL;DR / Quick Summary
Planning a custom motorcycle paint job requires understanding surface prep, multi-layer coating chemistry, and realistic production timelines.
Key Takeaways:
- Early fall booking avoids spring queue delays and gives coatings full curing time before the riding season starts.
- True durability depends on substrate-specific etch primers applied to bare metal, fiberglass, and ABS plastic.
- High-solids clear coats need multi-stage thermal baking and wet sanding from 1500 to 3000 grit for mirror reflection.
- DIY spray jobs lack climate control, chemical hardeners, and bake cycles, risking peeling and fuel-spill blistering.
- Full custom paint builds typically take 2 to 4 weeks depending on graphics, candy layers, and bodywork repairs.
Why Early Fall Is the Optimal Window for Custom Motorcycle Painting
Timing your motorcycle repaint around seasonal shop cycles directly impacts both turnaround speed and finish quality. Many riders wait until the first warm weekend in April to drop off their bike, only to discover that every local motorcycle paint shop is backed up with seasonal collision repairs and spring tune-ups.
Scheduling your project between September and November provides distinct practical advantages:
- Zero Lost Riding Days: Late-season riding in southeastern Pennsylvania tapers off as temperatures drop. Scheduling shop time during fall storage means your bike is off the road only when you would not be riding anyway.
- Stable Winter Storage: Freshly cured clear coats need real time to fully outgas, commonly several weeks, before long-term storage. Completing the project in autumn allows your bike to rest protected in a climate-controlled garage or storage unit all winter, emerging in spring with maximum surface hardness.
The Concept-to-Finish Lifecycle of a Motorcycle Custom Paint Job
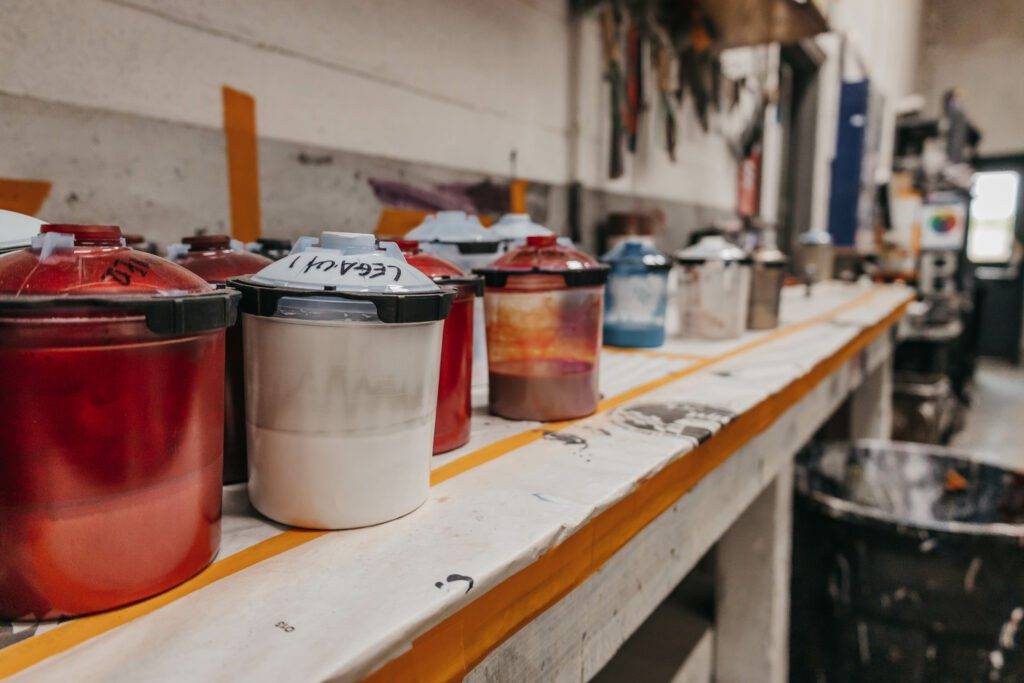
Executing a high-end motorcycle custom paint job requires a strict sequential workflow. Skipping even a single prep phase compromises the adhesion of every layer applied on top of it.
- Conceptual Design & Color Lab: Defining the aesthetic and matching or formulating custom pigments with digital precision.
- Teardown & Stripping: Full disassembly of hardware and chemical cleaning to ensure a contaminant-free surface.
- Substrate & Body Prep: Repairing dents or cracks and applying substrate-specific epoxy primers for maximum adhesion.
- Base, Candy & Art: Application of base colors, graphics, and translucent mid-coats inside a climate-controlled booth.
- Clear Coat & Curing: Applying high-solids UV-protective clear coats followed by a multi-stage thermal bake cycle.
- Wet Sand, Buff & Reassembly: Multi-stage polishing for a mirror finish and final assembly to factory torque specifications.
What You Can Handle vs. When to Call a Pro
Understanding what tasks you can safely tackle in your home garage helps you budget effectively while protecting the structural and cosmetic integrity of your motorcycle.
Tasks Most Riders Can Do
- Tin Removal and Labeling: Removing the seat, gas tank, front fender, rear fender, and side covers yourself can reduce labor costs. Always label hardware, bag bolts in labeled zip pouches, and plug open fuel lines immediately.
- Initial Surface Cleaning: Washing loose components thoroughly with grease-cutting dish soap and warm water removes top-layer road grime before dropping parts off at the shop.
Tasks for Confident Enthusiasts
- Removing Decals and Tank Badges: Using a handheld heat gun on low heat with 30-lb monofilament fishing line to gently slice through factory badge foam adhesive without gouging the metal.
- Light Scuffing of Sound OEM Clear: Using a maroon non-woven scuff pad with soapy water on factory-painted parts that only need a color scuff-and-shoot, provided there are no chips, cracks, or rust spots.
When to Call a Professional
- Dented Tanks and Structural Metalwork: Pulling dents on a pressurized fuel tank without breaching the wall or igniting residual fuel vapors requires specialized collision tools and safety measures.
- Using two-component (2K) products containing isocyanates: Spraying these materials generates flammable mists and toxic vapors that require mechanical, explosion-proof ventilation and designated spray areas per OSHA Standard 1910.107
- Candy, Flake, and Multi-Stage Graphics: Spraying translucent candies and metal flakes requires uniform booth airflow, precise gun atomization, and expert hand overlap that cannot be replicated with spray cans in an open garage.
Red flags requiring immediate professional attention:
- Rust bubbling beneath paint around fuel bungs or lower tank seams
- Spiderweb stress fractures radiating through fiberglass fairings
- Peeling clear coat where prior repairs bypassed adhesion primers
Common Motorcycle Painting Mistakes to Avoid
1. Painting Over Contaminated or Unsealed Metal
What people do wrong: Wiping bare metal with shop rags containing silicone residues, or spraying lacquer over uncured enamel.
Why it’s a problem: Trapped moisture and contaminants cause blistering, bubbling, and delamination within months.
The right approach: Use a dedicated wax-and-grease remover wiped with the two-rag method (one wet, one dry), followed immediately by a dedicated epoxy primer.
2. Using 1K Aerosol Cans on Fuel-Exposed Parts
What people do wrong: Spraying single-stage hardware store rattle cans on gas tanks or surrounding fairings.
Why it’s a problem: 1K paints dry through solvent evaporation rather than chemical cross-linking. A single drop of gasoline from a pump nozzle will liquefy and dissolve the finish.
The right approach: Catalyzed two-component (2K) urethane topcoats utilize an isocyanate hardener to form a cross-linked polymer network that provides high chemical and fuel resistance. The spray application of these coatings at local collision repair facilities is governed by the EPA’s National Emission Standards for Hazardous Air Pollutants (NESHAP) under 40 CFR Part 63 Subpart HHHHHH (commonly known as the 6H Auto Body Rule).
3. Sanding Through Sharp Body Lines
What people do wrong: Aggressively color-sanding tank ridges, fender crowns, and body creases with soft sanding blocks.
Why it’s a problem: Paint naturally lays thinner over sharp contours. Aggressive sanding burns through the clear coat into the base color, forcing a complete repaint of the panel.
The right approach: Mask off body ridges with fine-line tape during initial sanding passes, hand-sanding edges lightly with 3000 grit only at the final stage.
Conclusion
A high-grade custom motorcycle paint job transforms your bike into an enduring work of mechanical art. Achieving a mirror-flat, fuel-proof finish demands precise substrate preparation, dedicated climate control, and meticulous color-sanding technique. Starting your project in early fall ensures your build receives undivided artisan attention, cures thoroughly over the winter months, and hits the pavement the moment spring riding begins.
At Barry’s Collision Repair, our technicians bring decades of dedicated collision, mechanical, and custom refinishing experience to every bike we touch. If you have a custom concept in mind, contact us on our website or stop by our Parkesburg facility to discuss your build.
Serving Parkesburg, Coatesville, Atglen, Christiana, Gap, and the surrounding Chester County region.
Frequently Asked Questions
Does cool Pennsylvania fall weather affect how motorcycle paint cures?
Not inside the shop; 2K urethane clear coats cure through a chemical reaction, not simple air-drying, so a climate-controlled spray booth keeps the curing environment consistent regardless of the outside temperature. This is part of why fall booking works well: the actual application and bake cycle happen in a controlled environment either way, and the cooler months that follow give the finish uninterrupted time in storage to fully harden before spring riding.
What’s the difference between matching an OEM color and creating a custom tint formulation?
Matching an OEM (original equipment manufacturer) color starts from an existing factory formula, typically pulled via the VIN, tank sticker, or manufacturer paint code, and reproduces it using computerized spectrophotometer scanning. A custom tint formulation starts from nothing: base pigments and tint concentrates are mixed and adjusted by hand until the result matches a swatch, photo, or vision that has no existing manufacturer formula. Both rely on the same scanning equipment, but custom tints take more trial mixing since there’s no factory recipe to pull from.
Can custom paint resist spilled gasoline?
Yes, provided the shop finishes the parts with catalyzed two-component (2K) high-solids urethane clear coat. Once fully cross-linked and thermally cured, modern automotive clears create a chemical shield that resists occasional gasoline splashes and engine heat.
Can you repair and paint cracked fiberglass or plastic fairings?
Yes. Cracked ABS plastic is repaired using structural plastic welding and flexible reinforcement meshes, while fiberglass components are ground out and rebuilt with layered epoxy resin cloth before priming.
How can you tell if a motorcycle needs a full repaint versus just a fresh clear coat?
The deciding factor is whether the base color itself is compromised, not just the top layer. If the color coat underneath is still solid, even, and undamaged, but the clear coat has dulled, yellowed, or developed hairline crazing, a scuff-and-reclear can restore gloss without touching the color underneath. A full repaint becomes necessary once cracks, chips, or UV fading have gone through to the base coat, primer, or bare metal; at that point, a clear coat alone can’t mask the underlying damage.
Related Resources
- Why Choose Barry’s Collision Repair Over the Competition
- Seasonal Motorcycle Maintenance Tips for Parksburg Riders
- Frequently Asked Questions about Barry’s Collision and Repair
Sources
- OSHA Standard 1910.107 — Spray Finishing Using Flammable and Combustible Materials — Regulatory ventilation, equipment, and respirator standards cited for the clear coat baking and 2K urethane sections.
- EPA National Emission Standards for Hazardous Air Pollutants: Subpart HHHHHH Rule (6H Rule) — Compliance standard cited for 2K urethane topcoat application.